

Depending on the DAW you use, please refer to the end of this guide for punctual comments and tips.
MacOS USERS: Unless you use Logic Pro, AWLAYS use the VST3 version of our plugins - AU versions were written specifically for Logic Pro.
iOS USERS: Refer to the end of this page for ‘ab Compressor | Limiter X’ manual.
Set-Up
Upon inserting into the DAW, this plugin will try to adjust the input and output of the signal depending on the width of the channel. This assignment can be manually changed. Please mind that even if your input is Mono, your output should be either Stereo or Ambisonics (depending on your selection).
For working in native Ambisonics make sure your DAW is capable of handling 4-channel+ tracks (Nuendo, Cubase Pro, Logic Pro X, Pro Tools Ultimate, etc).
The Ambisonics Order is automatically adjusted depending on your track’s width (For Logic Pro, up to 1OA), and the CPU setting (up to 1OA, up to 3OA, or up to 7OA).
To listen to an Ambisonics signal in your speaker array, you must use a decoder. Any decoder that works with an Ambisonics signal (Ambix) works - we recommend ‘ab Advanced Decoder’.
Cross OS | Cross DAW Presets
You can create and delete presets. Once a preset is saved, it will automatically be available in any Plugin format on your system (VST3, AU, AAX). Presets are saved as independent files, meaning you can copy them between Windows and Mac so that you can carry them with you or even share them.
On Windows, presets are in “Users\Public\Documents\Audio Brewers”
On Mac, presets are in “/Users/Shared/Audio Brewers”
Input

The header of the plugin contains different controls that help you work with the dry signal before it is processed.
Depending on your Input Signal, some of the controls will be unavailable.
WIDTH: Controls the stereo image of the signal, from mono, to narrow to wide. This control is available only when the input signal is Stereo.
ab Compressor | Limiter
Visualiser
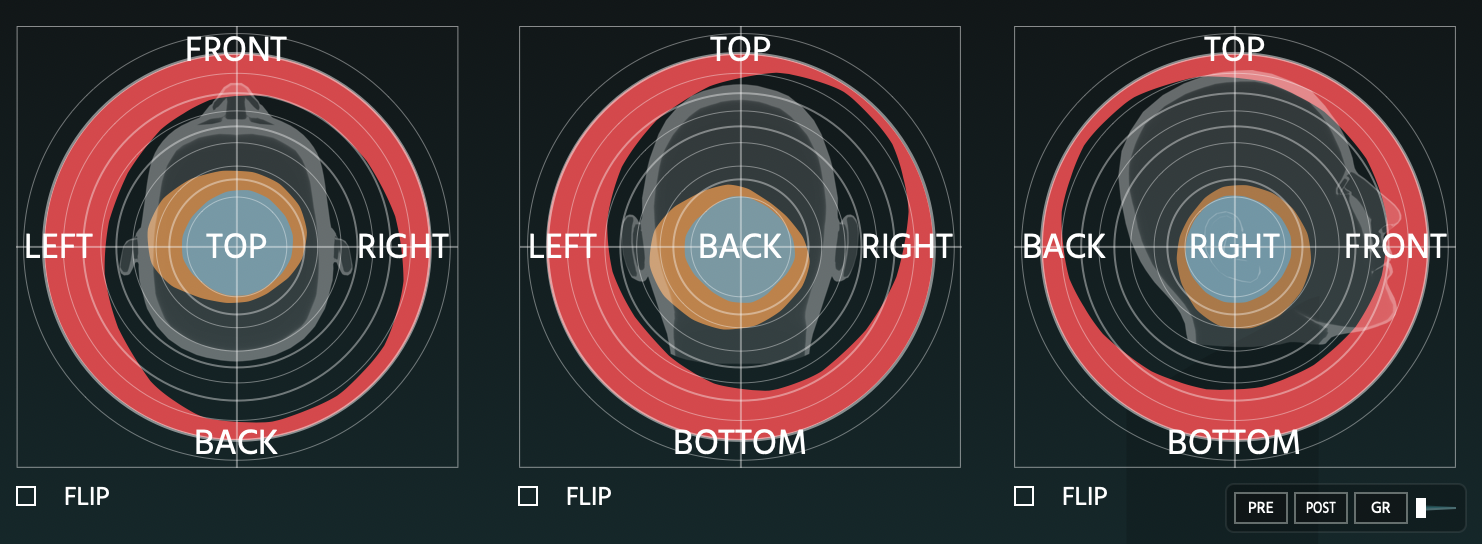
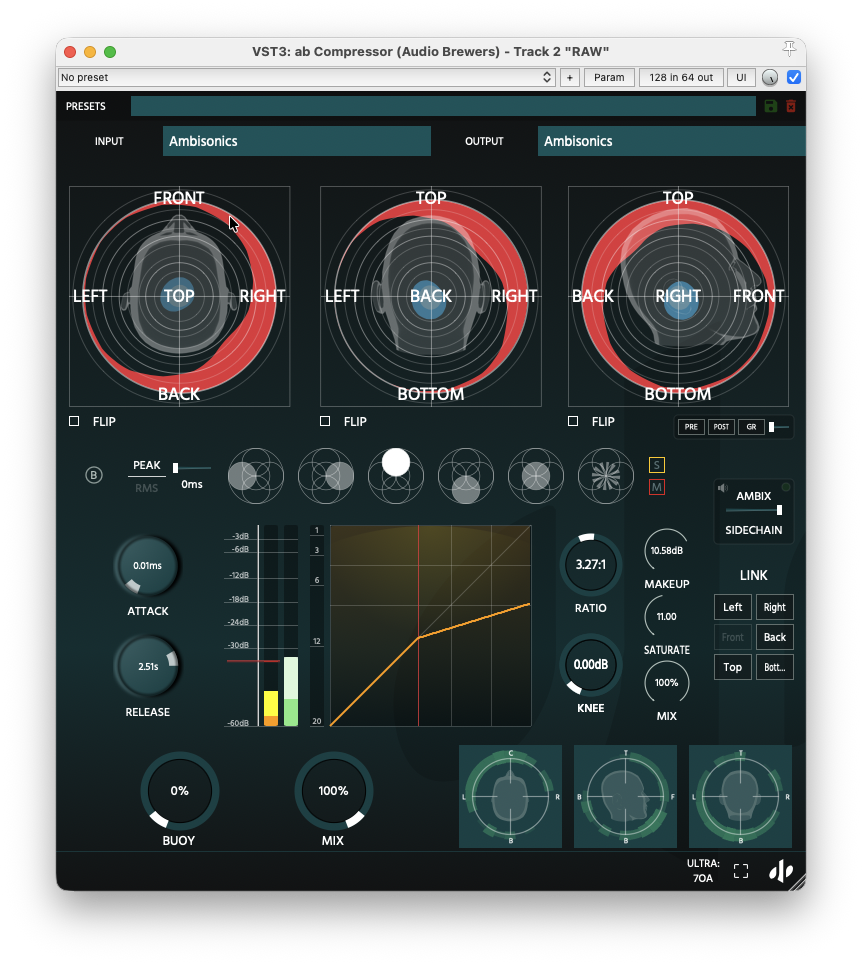
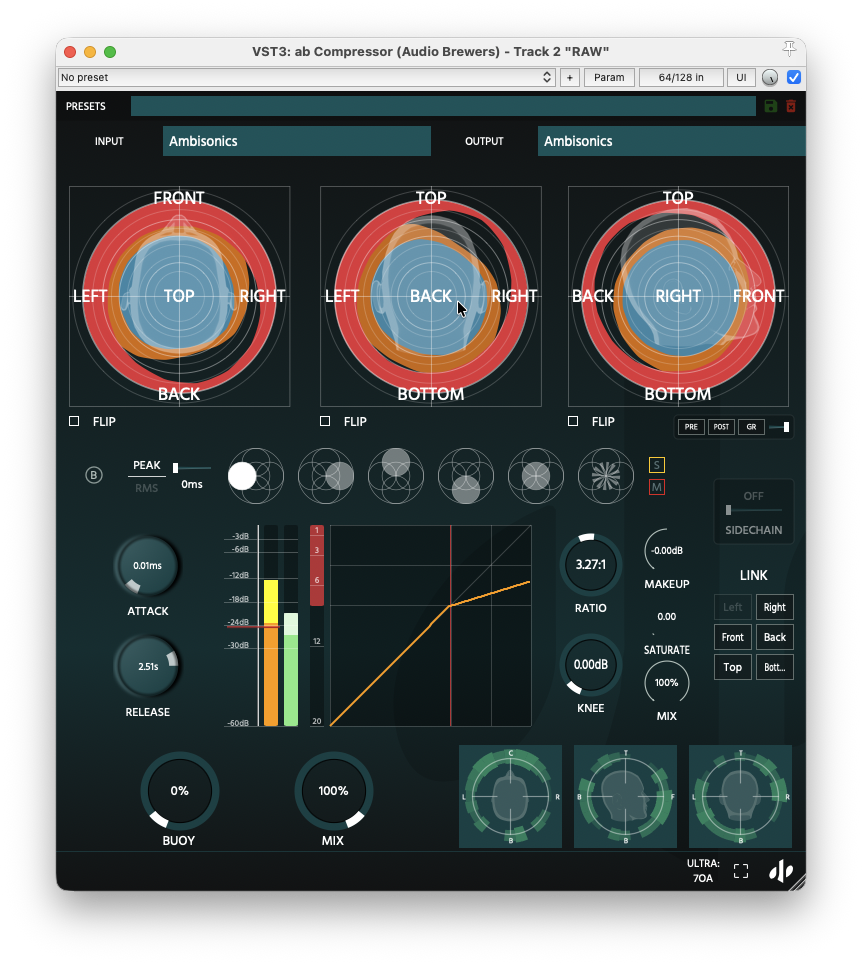
The Visualiser displays the soundfield from three orthogonal perspectives: Front, Top, and Side, providing a complete view of the soundfield.
The orange graph represents the input signal (PRE), the blue graph the processed output (POST), and the red graph the amount of Gain Reduction (GR) applied by the compressor or limiter. The concentric circles are reference guides to help estimate the level and shape of the signal.
The PRE, POST, and GR buttons allow you to select which graph is displayed. The Zoom slider adjusts the visualisation scale, making low-level signals easier to inspect without affecting the audio. Flip mirrors the display to match your preferred viewing orientation.
‘Dimensional Pole’ Controls

Within each dimensional pole, only components that exceed the threshold are compressed; components below it stay unchanged
Below the Visualiser, you have the Dimensional Pole controls. These are the controls that allow you to make changes in each dimensional pole.
Mainly, you can select which dimensional pole you will work on by simply clicking on the button that represents it (LEFT, RIGHT, FRONT, BACK, TOP, BOTTOM), but that’s not all, each dimensional pole contains the following global controls:
SOLO: Allows you to SOLO the dimensional pole.
MUTE: Allows you to MUTE the dimensional pole.
‘Compressor’ Controls
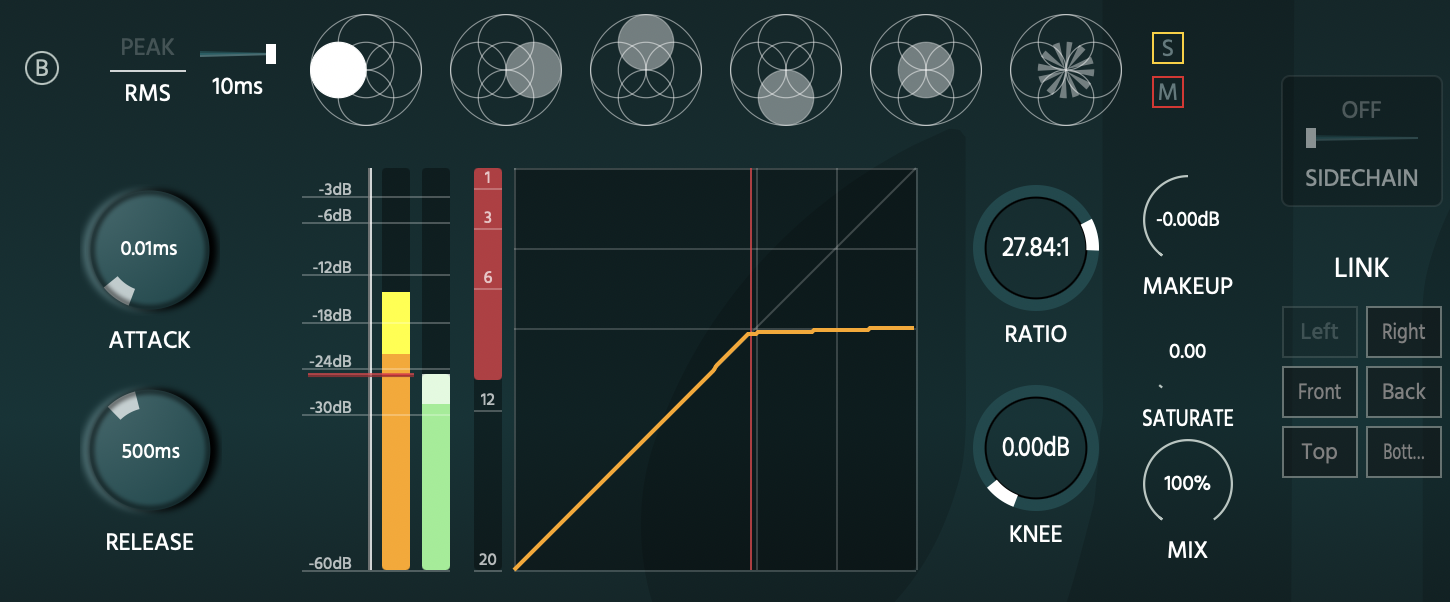
Lookahead (0–10 ms) delays the signal to allow the compressor to react before transients occur. This is a global control and affects all Dimensional Poles.
The remaining controls are applied independently to the currently selected Dimensional Pole, unless linked to other poles.
Bypass bypasses processing for the selected Dimensional Pole.
Peak / RMS selects whether the compressor detects Peak or RMS levels.
Attack (0.01 ms – 300 ms) determines how quickly the compressor responds once the signal exceeds the Threshold.
Release (0.01 ms – 5 s) determines how quickly the compressor returns to normal gain after the signal falls below the Threshold.
Threshold is adjusted using the red bar within the meters and determines the level at which compression begins. It is set independently for each Dimensional Pole.
Pre, Post, and Gain Reduction meters display the input level, output level, and the amount of gain reduction being applied.
Ratio (1:1 – 99:1) controls the amount of compression. Ratios above 99:1 automatically switch the processor into Limiter mode.
Knee (0–20 dB) adjusts how gradually the compressor transitions into gain reduction and is available while operating in Compressor mode.
Make-Up Gain (−24 dB to +24 dB) compensates for the level reduction introduced by compression.
Saturation adds harmonic content to the selected Dimensional Pole.
Mix blends the processed and unprocessed signals, allowing parallel compression on a per-pole basis.
LINK groups Dimensional Poles so that parameter changes affect all linked poles simultaneously. All controls can be linked except Lookahead.
Unlike a masking compressor, which uses a loud signal to duck other content inside a mask, “ab Compressor | Limiter” applies gain reduction only to components whose own levels exceed the threshold. One component exceeding the threshold does not trigger gain reduction on others, even within the same dimensional pole, linked or unlinked
Understanding the meters:
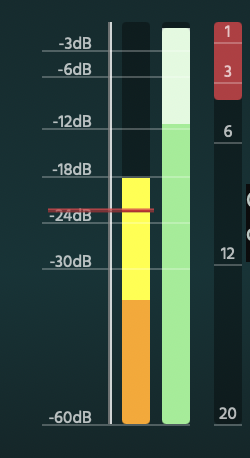
The Pre and Post meters show both the overall level of the selected Dimensional Pole and the variation between the spherical harmonics that compose it.
In the Pre meter, the orange section reaches the lowest of the detected spherical-harmonic levels. The yellow extension continues from that point up to the highest detected level. In the Post meter, the same information is shown in green and white respectively.
The size of the brighter extension therefore represents the level spread within the Dimensional Pole:
With a First-Order Ambisonics signal, each Dimensional Pole contains only one spherical harmonic. The lowest and highest levels are therefore identical, so no yellow or white extension appears.
From Second Order onwards, multiple spherical harmonics contribute to each Dimensional Pole. Differences between their levels create a visible yellow or white extension.
As compression reduces this variation, the brighter extension becomes smaller. With sufficiently strong compression, it may disappear almost completely.
This makes it possible to compare the internal level spread of each Dimensional Pole before and after compression, rather than viewing only a single peak level.
Sidechain
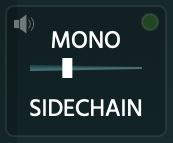
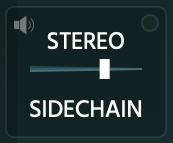
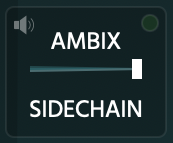
Sidechain is an amazing future of ‘ab Compressor | Limiter’.
When Sidechain is receiving signal, the Led on the top right of the square will go from Red to Green, like that you can visually know there’s something coming through the sidechain receive.
A Speaker button allows you to also quickly listen to “what’s coming to the sidechain” - a great way to monitor the Sidechain from within the plugin without having to go to the channel that is sending the signal.
Finally, a slider is available to enable the Sidechain - this slider will have different Sidechain type based on the DAW support and what type of signal is receiving. Sadly, some DAWs are limited to Mono SC signals (looking at you, Pro Tools…), however others give you full flexibility to support up to Ambisonics SC signals (Reaper).
Mono Sidechain will affect the compression on the whole soundfield equally.
Stereo Sidechain will affect the compression on the left and the right sides of the Soundfield.
Ambisonics Sidechain is a unique feature that allows you to apply compression to a specific region of the soundfield, rather than to the entire Ambisonics signal. It can be used to create dynamic "holes" anywhere around the listener, allowing other sounds to occupy that spatial region more clearly.
At the time of writing, Ambisonics Sidechain is available only in REAPER, thanks to its flexible multichannel routing.
To use Ambisonics Sidechain, configure the track containing ab Compressor | Limiter to 128 channels, regardless of the signal being processed.
The sidechain source should be routed from a 64-channel track (regardless of Ambisonics order) to channels 65–128 of the track hosting ab Compressor | Limiter. The plugin automatically interprets the incoming Ambisonics soundfield and uses it as the sidechain signal.
Further Controls

On the bottom-left side of the plugin, two controls are available to further manipulate the way the sound behaves.
BUOY is a great control to increase the spatial image of a signal and have its sound distributed three-dimensionally to manipulate it. For example, if you are using a Mono signal, the sound will be focused in the Front-Centre… and if you wanted to manipulate the vertical dimensional plane (Top, Bottom), a Mono signal wouldn’t contain any information there. Well, the Buoy knob will send sound to all dimensional planes and like that, you will be able to hear sound in all dimensional planes, even if it comes from two-dimensional sources.
MIX is the final control of the processing chain, which will help you blend the final three-dimensional compressed signal with your original signal.
Finally, a visualiser is also included to visually guide you on how the final output of the sound is being shaped in the sonic field around you.
CPU Mode
At the bottom-right of the plugin when the output is set to Ambisonics, a CPU control is available to control the resolution at which the plugin works.


LIGHT mode was designed to work with 1OA signals (or for STEREO signals), HIGH mode was designed to work with up to 3OA signals, finally, ULTRA mode was designed to work with up to 7OA signals.
Examples:
If for example you are running a 1OA signal, there will be no difference in sound quality between LITE, HIGH, and ULTRA (aside for the increased CPU consumption).
If you are running a 3OA signal, there will be no difference in sound quality between HIGH, and ULTRA (aside for the increased CPU consumption).
On the other side, if you are running a 5OA signal and you set the plugin to work in HIGH mode, the signal will be capped to 3OA.
So based on the above, adjust the CPU mode to that of your highest-order signal.
-
If your audio is not Ambisonics, encode it to any Ambisonics order.
If your audio is Ambisonics, insert it in an Ambisonics track (1OA through 7OA).
Insert this plugin with the output width of your choice.
-
Make sure your signal is Ambisonics (if it’s not, encode it using ‘ab Encoder’
Insert this plugin.
-
Insert this plugin in an Ambisonics track AS A PANNER, and make sure the signal running through it is Ambisonics (encode it to Ambisonics if it’s not)
-
Make sure your signal is Ambisonics, encode it to Ambisonics if it isn’t.
Remember to set the track width to at least 4 channels. We highly suggest you simply use a 64in/64out track.
-
As Resolve 19 and above come with an included Decoder that cannot be swapped, this plugin is only useful if you want to grab 1 beam from an Ambisonics signal. To do that, insert the plugin in an Ambisonics track, and insert this plugin to create only 1 beam.
-
Use this plugin in a 9.1.6 track.
Make sure the signal running through it is Ambisonics.
Insert this plugin AS A PANNER.
ab Compressor | Limiter X
ab Compressor | Limiter X is a “light” version of ‘ab Compressor | Limiter’ designed to work in iOS devices as a Standalone or AUv3 plugin.
ab Compressor | Limiter X works just like ab Compressor | Limiter, but it’s different in that it only contains three dimensional poles (left, right and front) due to the limitations of iOS DAWs being in Stereo.