‘ab Stutter’
ab Stutter is an innovative Stutter designed with spatial decoupling of planes in mind. ‘ab Stutter’ is capable of independently processing the Omni plane, the Width, the Height and the Depth plane. Each of the planes can be processed in sync with your DAW, or time-based, slices can be independently reversed, and the buffer of up to 20 seconds, can be looped for sound design applications.
But that’s not all, ab Stutter was also designed with musicians in mind, allowing the user to control the Stutter Engine with any MIDI CC.
ab Stutter, was designed to work with Mono, Stereo and Ambisonics Signals (1OA to 7OA signals are supported. Processing and Stutters happen in up to 3OA).
Depending on the DAW you use, please refer to the end of this guide for punctual comments and tips.
Set Up
Upon inserting to the DAW, ‘ab Stutter’ will try and adjust the input and output of the signal depending on the width of the channel. This assignment can be manually changed. Please mind that even if your input is Mono, your output should be either Stereo or Ambisonics (depending on your selection).
For working in native Ambisonics make sure your DAW is capable of handling 4-channel+ tracks (Nuendo, Cubase Pro, Logic Pro X, Pro Tools Ultimate).
The Ambisonics Order is automatically adjusted depending on your track’s width (For Logic Pro, up to 1OA).
To listen to an Ambisonics signal in your speaker-array, you must use a decoder. Any decoder that works with an Ambisonics signals (Ambix) works - we recommend you our ‘ab Decoder Suite’.


Cross OS | Cross DAW Presets

Factory Presets come ready to be used in any DAW or OS. You can delete the presets and even save new presets. Once a preset is saved, it will automatically be available in any Plugin format on your system (VST3, AU, AAX). Presets are saved as independent files, meaning you can copy them between Windows and Mac so that you can carry them with you or even share them.
On Windows, presets are in “\Documents\Audio Brewers”
On Mac, presets are in “/Users/Shared/Audio Brewers”
Input

The header of the plugin contains different controls that help you work with the dry signal before it passes through the Reverb.
Depending on your Input Signal, some of the controls will be unavailable.
PRESENCE: Controls the focus of the input signal between discrete (focused) and omnipresent (sounds everywhere). This control is available only when the input signal is Mono or Stereo.
WIDTH: Controls the stereo image of the signal, from mono, to narrow, to wide. This control is available only when the input signal is Stereo.

DRY: Toggles the DRY signal on/off, by toggling the signal, the Buffer will clear and refill.
WET: Controls the volume of the ‘Dry’ input signal (double click to set back to default). This control can be assigned with a MIDI CC (see MIDI CC). Setting WET to 0 will clear the Buffer.
Stutter
ab Stutter can be a very simple Stutter (left) or a complex engine that controls each dimensional plane independently (right)


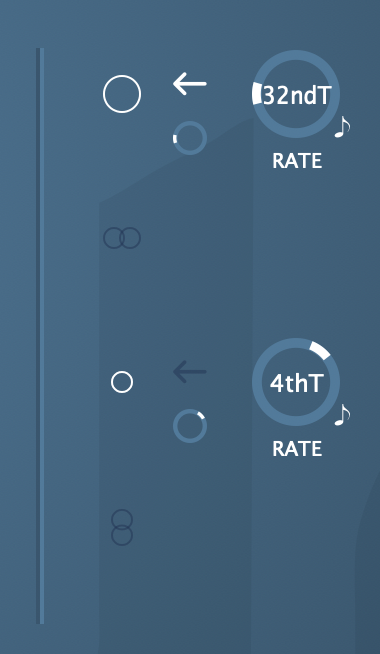
As soon as it’s inserted, the most basic control in the plugin is the Rate knob, which controls the rate at which the sound Stutters.
Next to the Rate knob, a small button toggles the rate from tempo-synced to time-based. When time-based is selected, the stutter rate can be assigned either by moving the knob, or by double clicking and manually writing down a rate.


On the left side, common controls will help you set the basic functions of ‘ab Stutter’.
A Reverse button reverses the stutter slices.
A Knee button toggles a knee on each slice attack and release, softening or hardening each slice - depending on the type of sound you’re looking for (this control is global).
The Loop button loops the stutter buffer until its cleared. That means that as soon as the buffer is filled, stutter slices will be selected from the current buffer and the buffer will not be updated (this control is global).
The Buoy knob is a great tool that will help you fill the three-dimensional acoustic field with sound. Because the Mono/Stereo signals lack of three-dimensional properties, this knob is very useful for filling the space and being able to control the stutter in each plane. If you are mixing a Mono/Stereo sound in a Dolby Atmos bed or Surround Object, this knob will fill your room with sound (this control is global).
The Buffer knob helps you assign the size of the buffer, up to 20 seconds. By moving this knob, the buffer will be cleared (this control is global).
On the right side, four buttons toggle the independent plane control on and off.
A plane that is toggled OFF will automatically be controlled with the main Rate knob and Reverse buttons. Upon toggling any of the planes ON, that specific plane will be independent.
There are four planes available: Mid, Width (left-side sides), Height (up-down) and Depth (front-back).

When any of the dimensional planes buttons is toggled ON, an independent Reverse button a Gain and a Rate knobs will help you controlling the stutter of that specific plane.
That way, any or all the planes can work completely independent from each other for complete spatial chaos!
Spatial Control
The final Stutter you have designed, can be rotated three-dimensionally as well as each of the planes can be muted if desired. When working in Stereo, rotation produces interesting psycho-acoustic results of a three-dimensional rotation (especially if the planes are being controlled independently).
When working in Surround or Atmos, these controls will completely transform the way sound reaches you.
The Spatial Control will only manipulate the Stutter signal, while the DRY signal will stay static.

Finally, a visualiser is also included to visually guide you on how the final output of the stutter is being shaped in the sonic field around you.

-
Insert a track with the width of your audio file (if you are working with a MONO WAV, insert a MONO Audio Track, for STEREO WAVS, insert a STEREO Track, for Ambisonics WAVS, insertr a 1st/2nd/3rd Order Ambisonics track.
Insert ab Stutter with your desired Output configuration, and upon insertion, ab Stutter will automatically set the Input and Output.
If you are adding ab Stutter to an Instrument Track with Kontakt with one of our Audio Libraries, you’ll need to insert the ‘ab Companion’ BEFORE the ‘ab Reverb’ to convert the track to Ambisonics.
If you are working in Ambisonics, remember to add a decoder at the end of your insert chain to be able to properly listen to the signal.
-
If you are working in Mono or Stereo, regardless of your audio file type, make sure your track has a Stereo configuration. Also, make sure you manually adjust the “Input” setting of ab Delay to match the WAV file.
If you want your output to be Ambisonics, make sure your track is set to Surround, and of course, make sure you decode the signal.
If you are working in Ambisonics, make sure your use a decoder the end of the insert chain (e.g. our ab Decoder) to properly listen to the signal.
-
If you want your output to be in Ambisonics, make sure you add your MONO/STEREO/AMBISONICS WAV in a 1st/2nd/3rd Order Ambisonics Track.
If you are working in Ambisonics, remember to select a Decoder (e.g. our ab Decoder) in the panner (only for Nuendo and Cubase Pro)
Ambisonics signals are only available in Nuendo / Cubase Pro.
-
If you are working in Ambisonics, remember to set the track width to at least 4 channels.
To receive MIDI CC messages, simply add ‘ab Stutter’ in your track and make sure the track is receiving the MIDI Channel as Input. If you are using a Virtual Instrument, make sure it passes MIDI Information through (for Kontakt, go to Settings -> Engine -> Send MIDI to Outside World and select AT LEAST “Incoming CCs”). Assign the MIDI CC in ‘ab Stutter’ and toggle the MIDI CC icon ON.
If you are working in Ambisonics, remember to add a decoder at the end of the Inserts chain.
-
If you’re working with Immersive Audio, Regardless of your final Output, use this plugin in a 9.1.6 track.
If you are using this plugin in a BUS, and receiving signal from a Mono/Stereo signal, make sure your BUS is 9.1.6 AND that you have ‘ab Encoder’ encoding from 9.1.6 to Ambisonics, then this plugin should work from AMBISONICS to AMBISONICS.
The Panner of your track should always be a Decoder (we suggest ‘ab Decoder HOA).
If working in Stereo, work with Stereo tracks just like with any other plugin.
-
If you’re working with Immersive Audio, Regardless of your final Output, use this plugin in a Dolby Atmos 9.1.6 track.
The final insert of your track should always be a Decoder (we suggest ‘ab Decoder HOA).
If working in Stereo, work with Stereo tracks just like with any other plugin.
-
This Plugin is compatible with ALL DAWs. If your DAW only supports Mono/Stereo signals, make your you set the appropriate input/output settings. All ‘under-the-hood’ processing will happen in Ambisonics :)