‘ab Imager’
ab Imager is a sound processor that will allow you to control the shape, focus, and size of any Ambisonics Signal (1OA through 7OA*).
Additionally, ab Imager introduces our newest Upscaler, which is an algorithm we have create to enhance any Ambisonics signal to up to 7OA, for enhanced clarity and spatial awareness.*
ab Imager was designed to work with Mono, Stereo and Ambisonics (1OA through 7OA) Signals*.
Upscaler is not available in the Express version of ‘ab Imager’
Depending on the DAW you use, please refer to the end of this guide for punctual comments and tips.
Set Up
Upon inserting into the DAW, ‘ab Imager’ will try and adjust the input and output of the signal depending on the width of the track. This assignment can be manually changed. Please mind that even if your input is Mono, your output should be either Stereo or Ambisonics (depending on your selection).
For working in native Ambisonics make sure your DAW is capable of handling 4-channel+ tracks (Nuendo, Cubase Pro, Logic Pro X, Pro Tools Ultimate, etc.).
The Ambisonics Order is automatically adjusted depending on your track’s width (For Logic Pro, up to 1OA).
To listen to an Ambisonics signal in your speaker-array, you must use a decoder. Any decoder that works with an Ambisonics signal works - we recommend you our ‘ab Decoder HOA’.

Cross OS | Cross DAW Presets

Create your own presets and share them, exchange them, or use them in several OS. Once a preset is saved, it will automatically be available in any Plugin format on your system (VST3, AU, AAX). Presets are saved as independent files, meaning you can copy them between Windows and Mac so that you can carry them with you or even share them.
On Windows, presets are in “\Documents\Audio Brewers”
On Mac, presets are in “/Users/Shared/Audio Brewers”
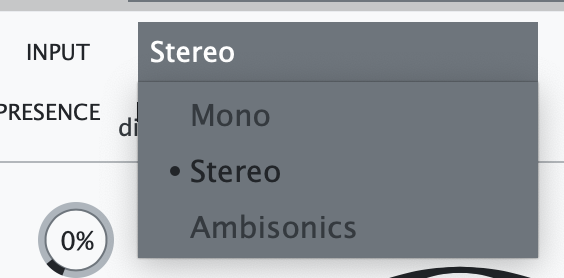
Input

The header of the plugin contains different controls that help you work with the dry signal before it passes through the Imager.
Depending on your Input Signal, some of the controls will be unavailable.
PRESENCE: Controls the focus of the input signal between discrete (focused) and omnipresent (sounds everywhere). This control is available only when the input signal is Mono or Stereo.
WIDTH: Controls the stereo image of the signal, from mono, to narrow, to wide. This control is available only when the input signal is Stereo.
DRY: Controls the volume of the ‘Dry’ input signal (double click to set back to default).
H.O.A. Upscaler*

We are so extremely happy to introduce our Higher Order Ambisonics Upscaler, an algorithm that will automatically take any Ambisonics signal (1OA to 6OA), and upscale it to up to 7OA, enhancing its quality, clarity and spatial awareness.*
The Upscaler is completely automatic, meaning there are no controls you have to deal with, it comes enabled by default but it is in Standby (saving CPU) as long as it is not needed.
The Upscaler will automatically detect the incoming order, and the order to upscale to, depending on the width of the track. So for example if you work with a 1OA signal in a 7OA channel, the Upscaler will understand it needs to upscale from 1OA to 7OA.
As soon as the Upscaler detects an upscalable signal, it’ll kick in and upscale it - otherwise, the Upscaler goes back to Standby mode leaving the signal untouched.
By clicking on the HOA Upscale button you can completely disable the Upscaler.
* The H.O.A. Upscaler is not available in ‘ab Imager Express’
Buoy: This is a great tool that will help you fill the three-dimensional acoustic field with sound. Because the Mono/Stereo signals lack of three-dimensional properties, this knob is very useful for filling the space and being able to control the the reverb’s size in each plane. If you are mixing a Mono/Stereo sound in a Dolby Atmos bed or Surround Object, this knob will fill your room with sound.

Dominance Control:
With Dominance Control the energy of the three-dimensional sound can be pushed towards any desired angle. Meaning that you will feel the centre of the sound moving towards said angle. This is a great way to place the sound somewhere different than originally whilst keeping its three-dimensional characteristics.
Dominance Control works in Higher Order Ambisonics - meaning that no matter what type of Ambisonics signal goes through (1OA through 7OA*), the processing will always happen in 7th Order so as to keep as best quality as possible.
Image Size Control:
With Image Size you can control the overall size of each dimensional plane. You can make your sound longer, taller, wider, bigger overall, or you can also make it thinner, shorter, lower, or smaller overall.

The Ambisonics Sphere graphic displays the current shape of the sonic energy. You can also click and drag on it to move the dominance of the Width and Depth dimensional planes, it’s a great way to keep a visual connection with the way you push the energy of the sound.
You will notice that as you change the Dominance and the Size of each dimensional plane using their dedicated controls (described later in this manual), the shape of this sonic sphere will continue to change.
The Dedicated controls are available on the right handside of the plugin, each dimensional plane contains its own set of controls.
OMNI: Controls the size of the Omnidirectional plane, the louder it becomes, the less wide the spatial image is.
WIDTH: Controls the size and the dominance of the Width dimensional plane. The knob controls the size (the louder it is, the wider the stereophony of the sound). The slider controls the dominance (moved to the left, the sound becomes dominant on the left. Moved to the right, the sound becomes dominant on the right). Dominance works in up to 7OA depending on the track’s width.
HEIGHT: Controls the size and the dominance of the Height dimensional plane. The knob controls the size (the louder it is, the taller the sound). The slider controls the dominance (moved to the left, the sound becomes dominant above. Moved to the right, the sound becomes dominant below). Dominance works in up to 7OA depending on the track’s width.
DEPTH: Controls the size and the dominance of the Depth dimensional plane. The knob controls the size (the louder it is, the longer the sound). The slider controls the dominance (moved to the left, the sound becomes dominant in front. Moved to the right, the sound becomes dominant in the back). Dominance works in up to 7OA depending on the track’s width.

Spatial Control
Your reshaped signal can be rotated three-dimensionally towards any side (horizontally and vertically). This helps you further manipulate or focus it towards a specific angle. You can also mute each dimensional plane by clicking on the 4 buttons above the knobs.

Finally, a visualiser is also included to visually guide you on how the final output of the signal is being shaped in the sonic field around you.

-
Insert a track with the width of your audio file (if you are working with a MONO WAV, insert a MONO Audio Track, for STEREO WAVS, insert a STEREO Track, for Ambisonics WAVS, insert a 1st-7th Order Ambisonics track.
Insert this plugin with your desired Output configuration, if you are working in Surround or Dolby Atmos, we highly recommend you select 3OA as Output and then decode the signal to your speaker layout, for best results.
If you are adding this plugin to an Instrument Track with Kontakt (5.1) with one of our Audio Libraries in Ambisonics, you’ll need to insert the ‘ab Companion’ BEFORE this plugin to convert the track to Ambisonics.
If you are working in Ambisonics, remember to add a decoder at the end of your insert chain to be able to properly listen to the signal.
-
If you are working in Mono or Stereo, regardless of your audio file type, make sure your track has a Stereo configuration. Also, make sure you manually adjust the “Input” setting to match the WAV file.
If you want your output to be Ambisonics, make sure your track is set to Surround, and of course, make sure you decode the signal.
If you are working in Atmos, make sure you use a decoder at the end of the insert chain (e.g. our ab Decoder) to properly listen to the signal.
-
If you want your output to be in Ambisonics, make sure you add your WAV in a 1st/2nd/3rd Order Ambisonics Track. If the WAV file is not Ambisonics, make sure you insert an Encoder (e.g. our ‘ab Encoder’) first.
Regardless of your output, we highly recommend you work in 3OA tracks for best quality, as the plugin works natively in Higher Order.
If you are working in Ambisonics, remember to select a Decoder (e.g. our ab Decoder HOA) in the panner (only for Nuendo and Cubase Pro)
Ambisonics signals are only available in Nuendo / Cubase Pro.
-
If you are working in Ambisonics or Surround formats, remember to set the track width to at least 4 channels. If the track contains 16 channels, this product will work in 3OA format. If the track has 64 channels, this product will work in 7OA format.
If you are working in Ambisonics, remember to add a decoder at the end of the Inserts chain.
-
If you’re working with Immersive Audio, Regardless of your final Output, use this plugin in a Dolby Atmos 9.1.6 track.
The final insert of your track should always be a Decoder (we suggest ‘ab Decoder HOA).
If working in Stereo, work with Stereo tracks just like with any other plugin.
-
If you’re working with Immersive Audio, Regardless of your final Output, use this plugin in a 9.1.6 track.
If you are using this plugin in a BUS, and receiving signal from a Mono/Stereo signal, make sure your BUS is 9.1.6 AND that you have ‘ab Encoder’ encoding from 9.1.6 to Ambisonics, then this plugin should work from AMBISONICS to AMBISONICS.
The Panner of your track should always be a Decoder (we suggest ‘ab Decoder HOA).
If working in Stereo, work with Stereo tracks just like with any other plugin.
-
This plugin is compatible with ALL DAWs. If your DAW only supports Mono/Stereo signals, make your you set the appropriate input/output settings. All ‘under-the-hood’ processing will happen in Ambisonics :)