‘ab EQ’
Depending on the DAW you use, please refer to the end of this guide for punctual comments and tips.
MacOS USERS: Unless you use Logic Pro, AWLAYS use the VST3 version of our plugins - AU versions were written specifically for Logic Pro.
iOS USERS: Refer to the end of this page for ‘ab EQ X’ manual.
Set-Up
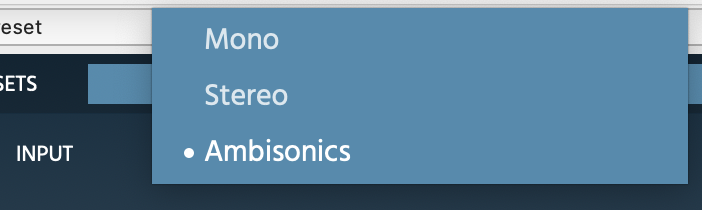
Upon inserting into the DAW, this plugin will try to adjust the input and output of the signal depending on the width of the channel. This assignment can be manually changed. Please mind that even if your input is Mono, your output should be either Stereo or Ambisonics (depending on your selection).
For working in native Ambisonics make sure your DAW is capable of handling 4-channel+ tracks (Nuendo, Cubase Pro, Logic Pro X, Pro Tools Ultimate, etc).
The Ambisonics Order is automatically adjusted depending on your track’s width (For Logic Pro, up to 1OA), and the CPU setting (up to 1OA, up to 3OA, or up to 7OA).
To listen to an Ambisonics signal in your speaker-array, you must use a decoder. Any decoder that works with an Ambisonics signal (Ambix) works - we recommend ‘ab Advanced Decoder’.

Cross OS | Cross DAW Presets
You can create and delete presets. Once a preset is saved, it will automatically be available in any Plugin format on your system (VST3, AU, AAX). Presets are saved as independent files, meaning you can copy them between Windows and Mac so that you can carry them with you or even share them.
On Windows, presets are in “Users\Public\Documents\Audio Brewers”
On Mac, presets are in “/Users/Shared/Audio Brewers”
Input

The header of the plugin contains different controls that help you work with the dry signal before it is processed.
Depending on your Input Signal, some of the controls will be unavailable.
PRESENCE: Controls the focus of the input signal between discrete (focused) and omnipresent (sounds everywhere, with no spatial information). This control is available only when the input signal is Mono or Stereo.
WIDTH: Controls the stereo image of the signal, from mono, to narrow to wide. This control is available only when the input signal is Stereo.
DRY: Controls the volume of the ‘Dry’ input signal (double click to set back to default).
ab EQ
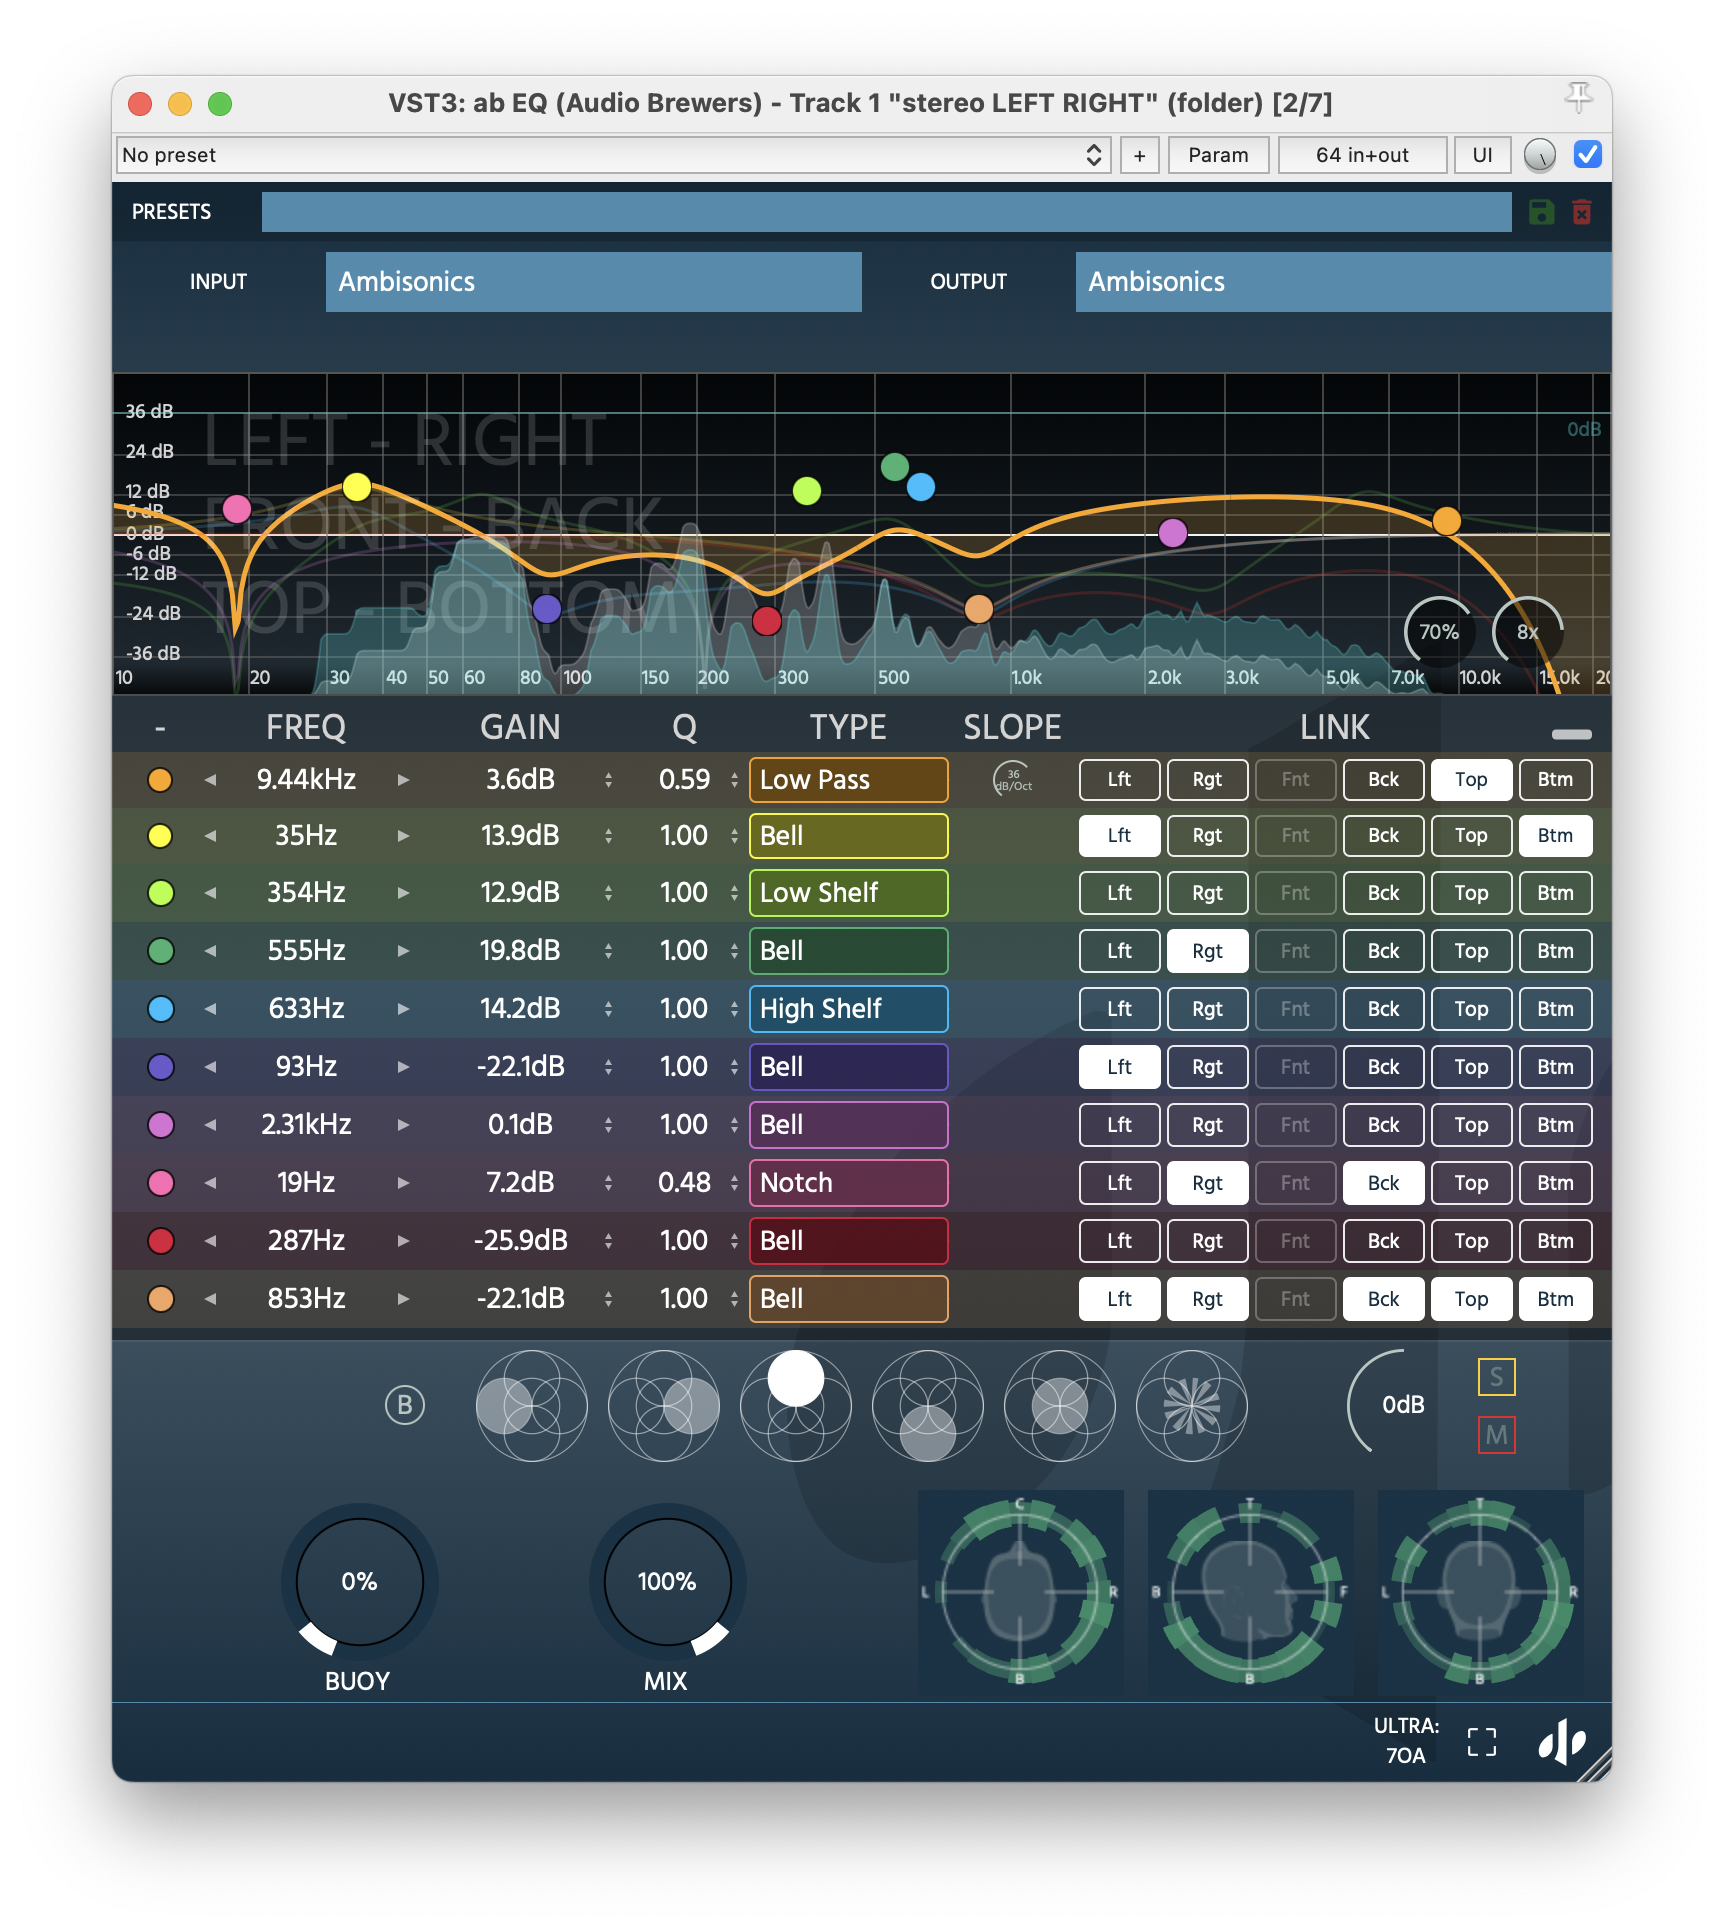
Visualiser
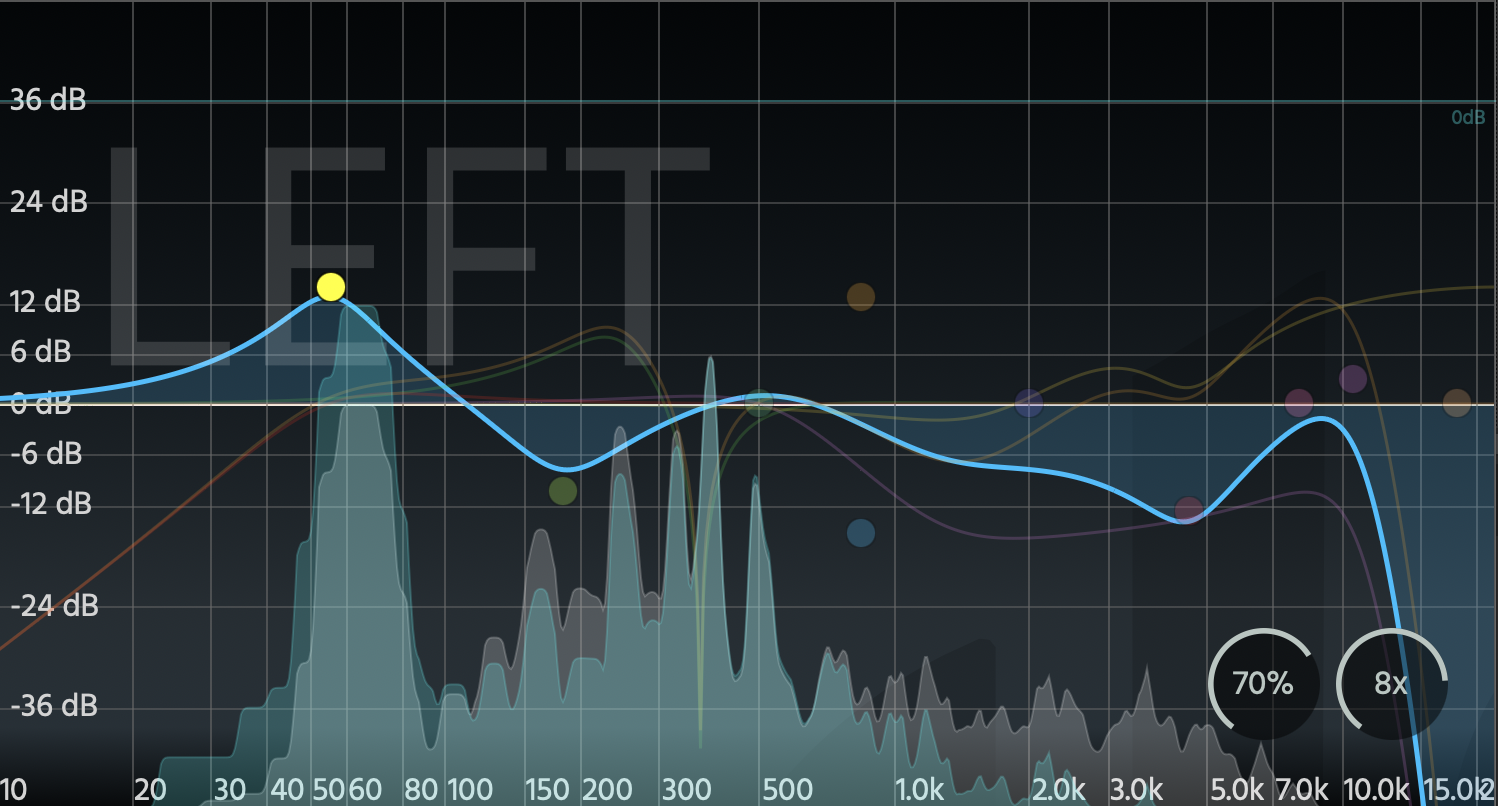
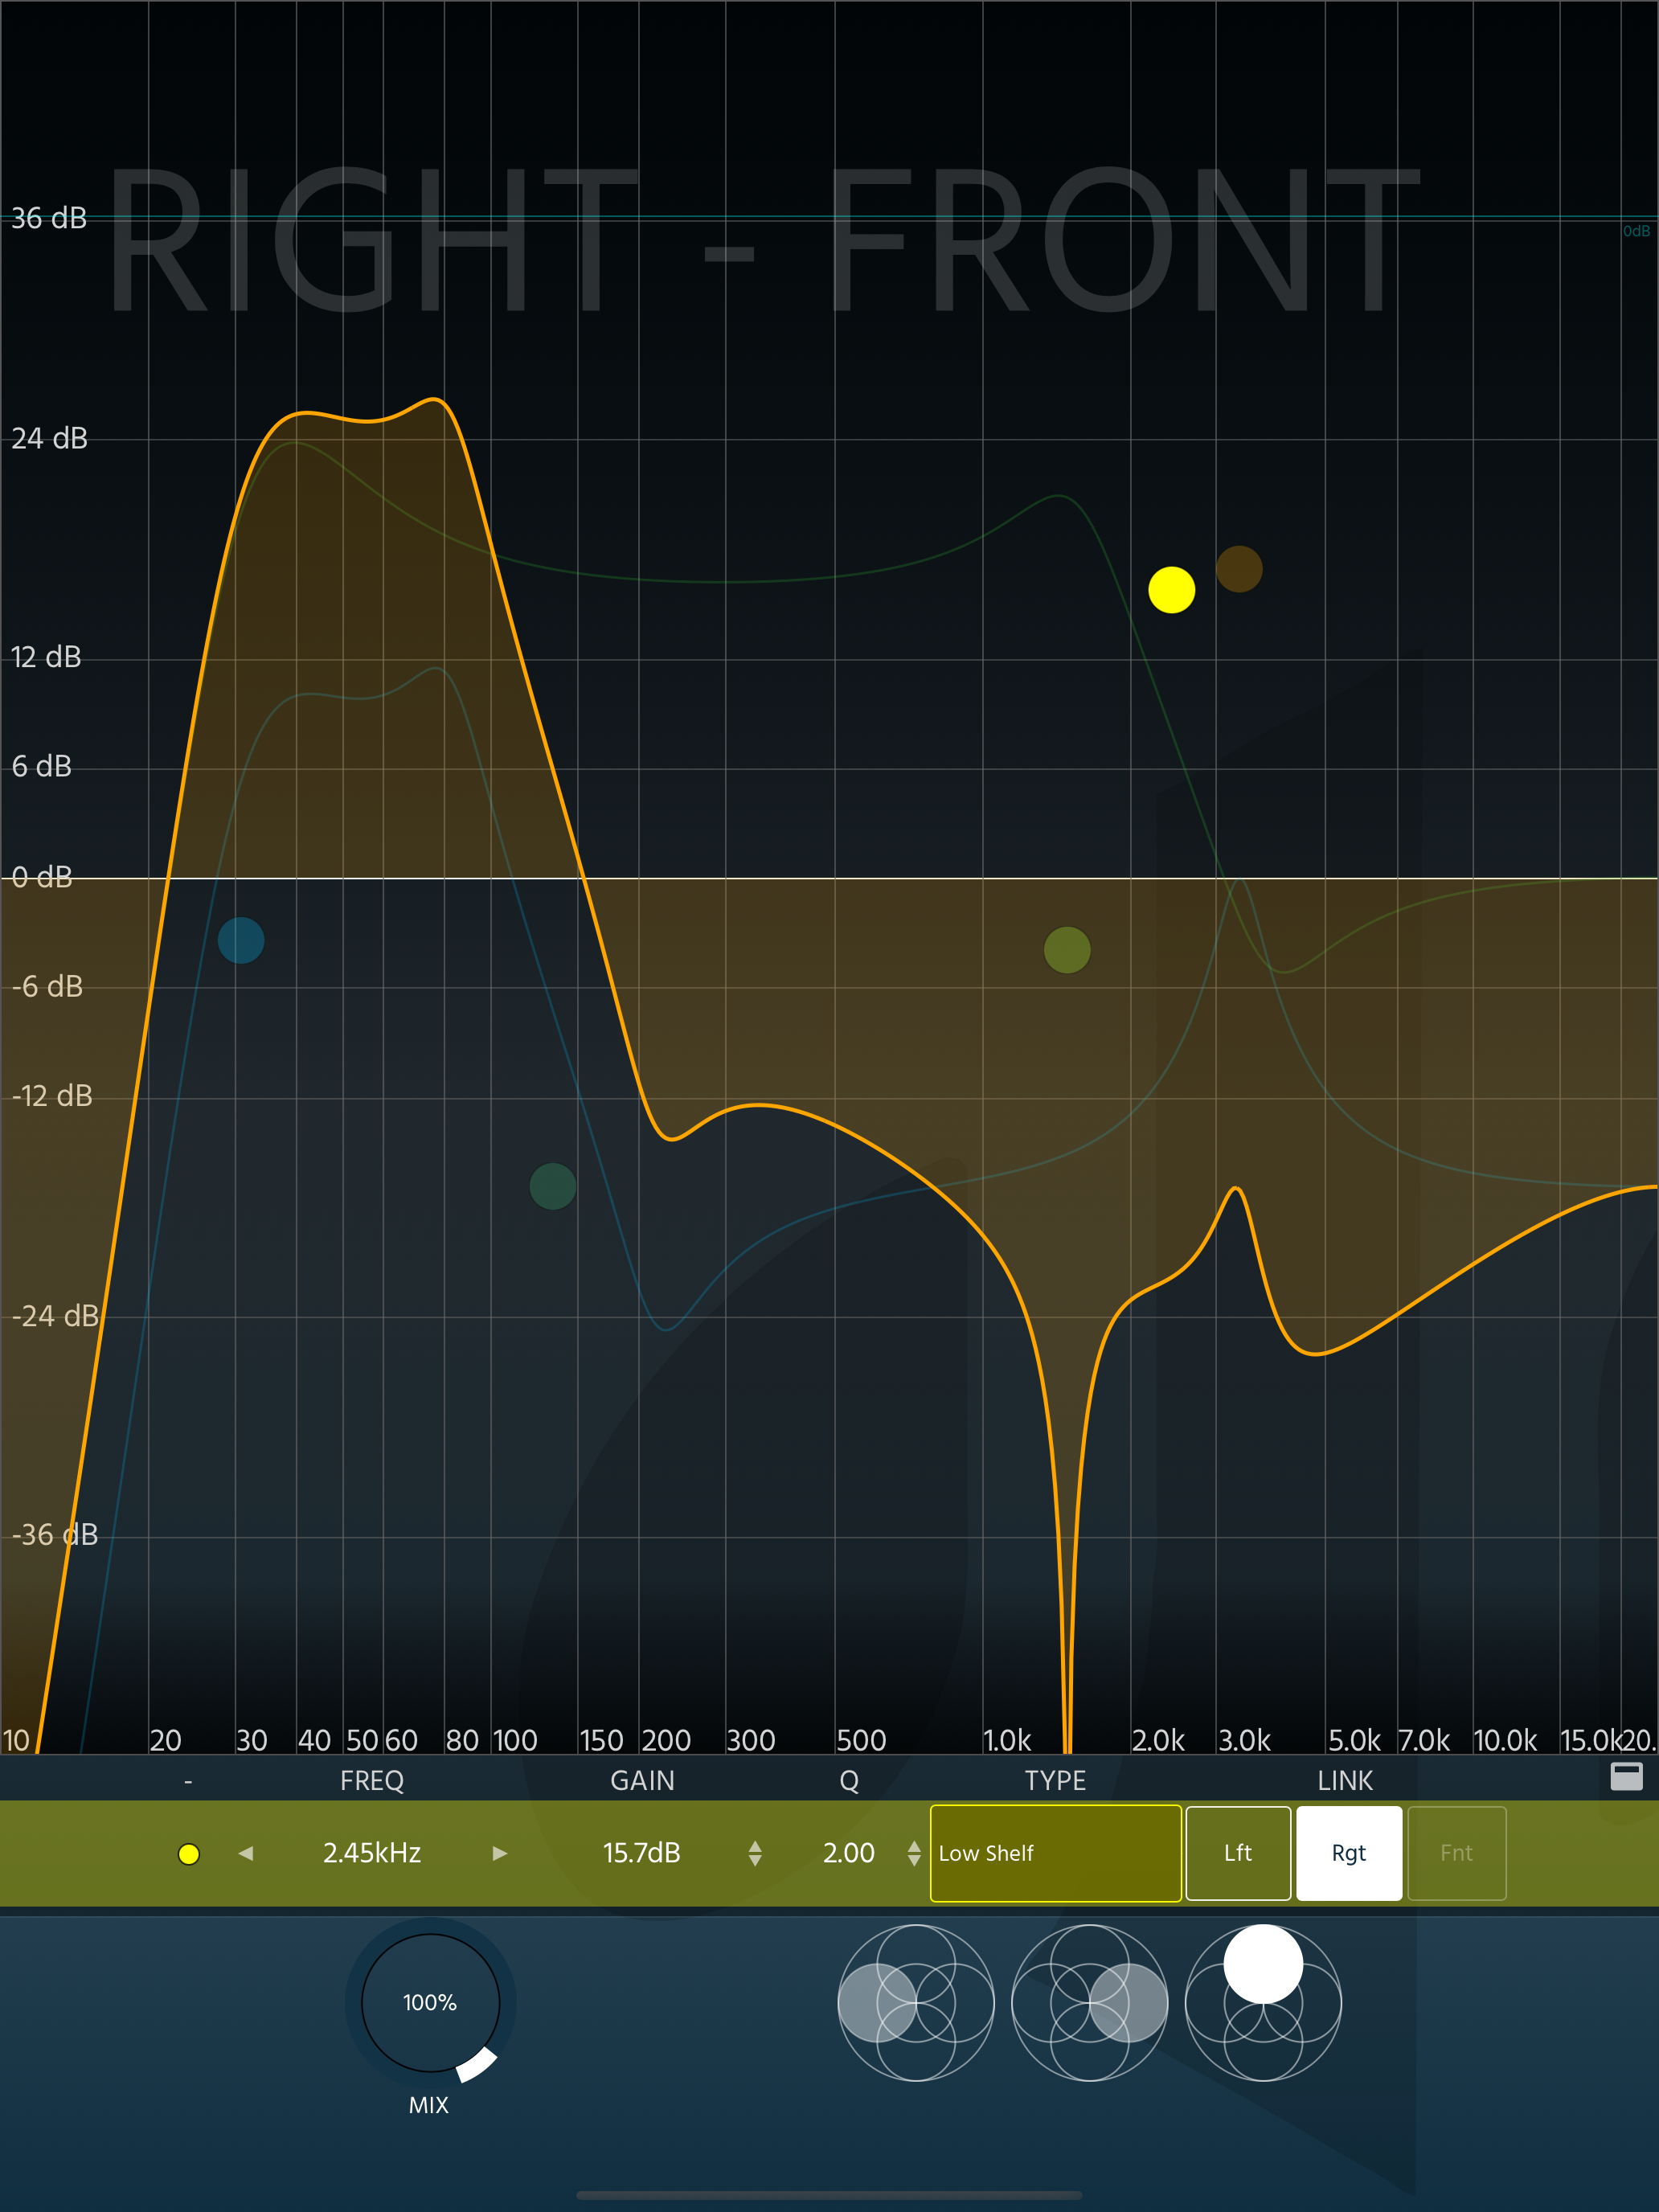
As soon as it’s inserted, ab EQ’s most real estate contains a visualiser with an EQ curve and a spectrum analyser of the Dry and Wet signals.
The curve and the spectrum visualisation goes from 10Hz to 24000Hz. From there, all 10 bands of each dimensional pole can be easily controlled by simply clicking and dragging them around, freely throughout the dB/Frequency spectrum.
Vertically, each band can be dragged from 0 to -36dB or to +36dB, horizontally they can follow the whole available frecueny spectrum (from 10hz and up to 24000hz).
The Spectrum Analyser, in grey, shows the DRY signal whereas the blue displays the WET signal.
The Spectrum graphic can be smoothed using the bottom-right dial, from 0% to 100%, and the FFT resolution can also be controlled, from 0.5x to 16x
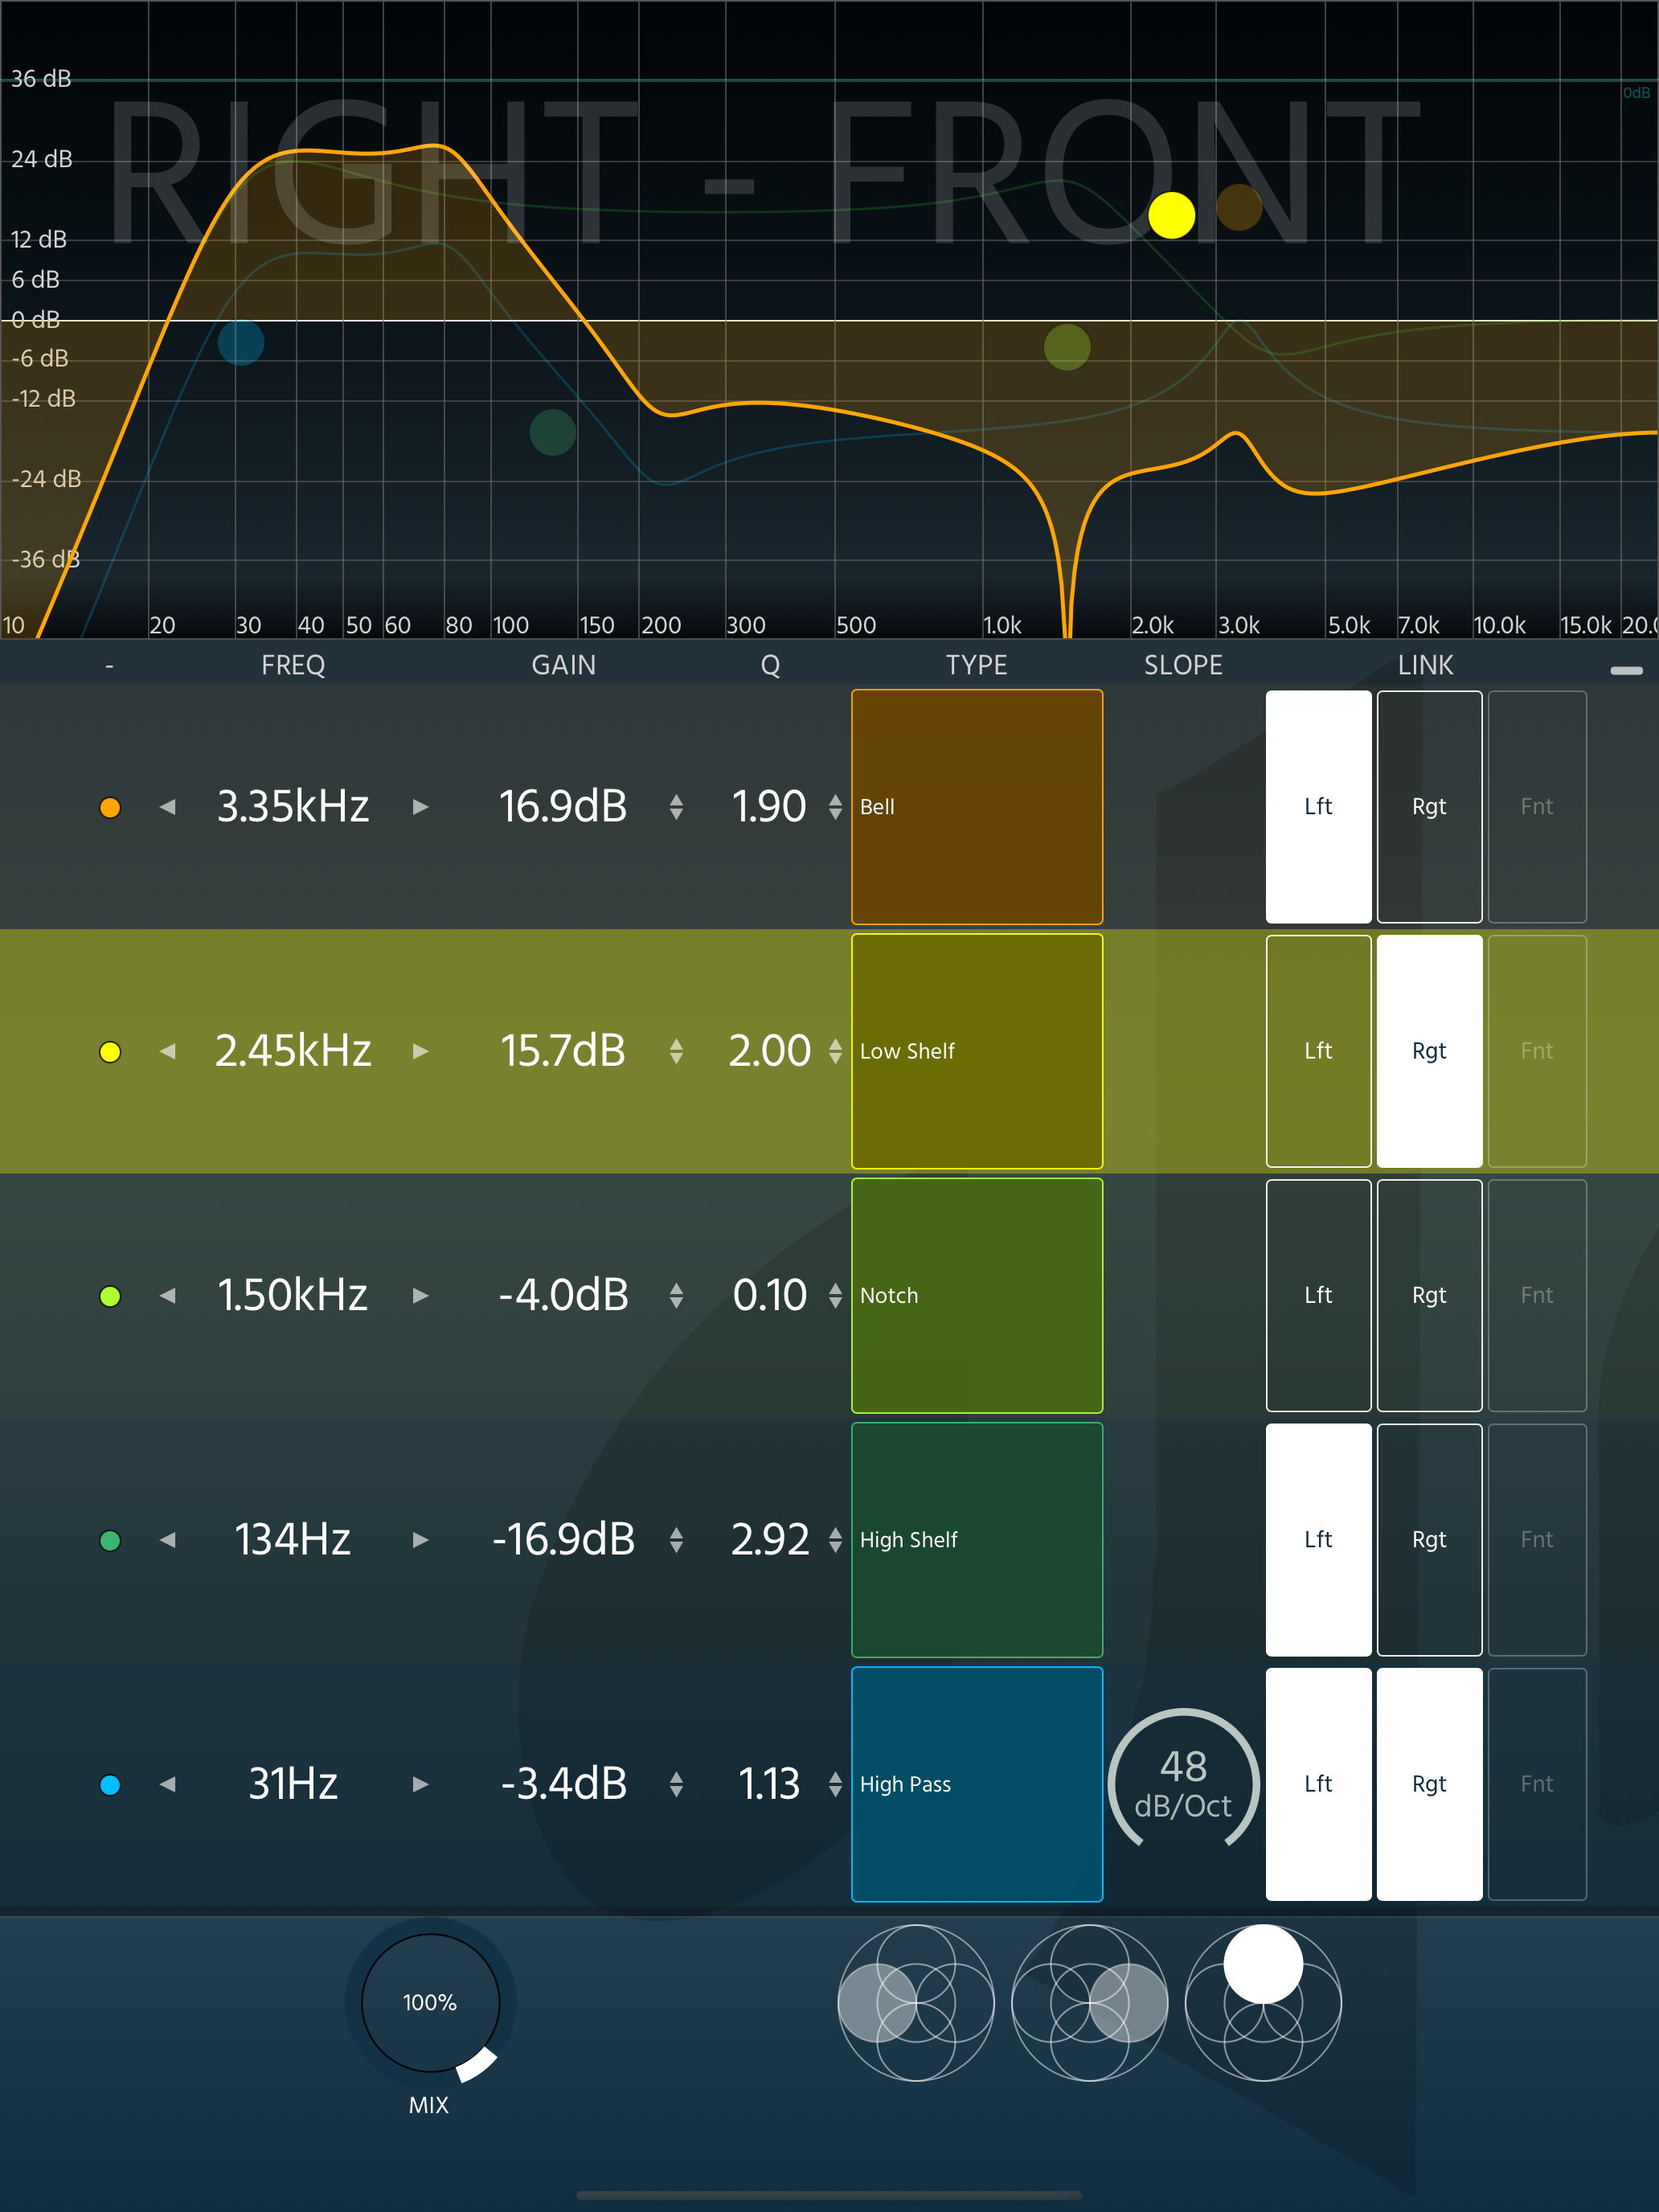
Upon clicking on any band, below the visualiser, it will become visible in a row for further fine-tuning.
Bands Rows
The Band Row can be expanded to display all 10 Bands of the selected dimensional pole, each band can be fine tuned in the row. The available controls from left to right are:
Bypass, Frequency, Gain, Q, Type of Filter, Slope (when the filter is High/Low Pass) and Link.
BYPASS: Toggle the specific band On/Off
FREQUENCY: Freely control the frequency that a band will work. You can either write down a number, or drag horizontally to adjust.
GAIN: Control the gain of a band, from -36dB to +36dB. You can either write down a number, or drag vertically to adjust.
Q: Control the Q of the band, from 0.1 to 10. You can either write down a number, or drag vertically to adjust.
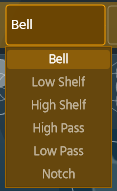
TYPE: Select the type of filter a band will use, available filter types are BellLow Shelf, High Shelf, High Pass, Low Pass and Notch.
SLOPE: (Only Visible if the filter is High/Low Pass), controls the dB per Octave of the filter.
LINK: The Link Section allows you to LINK that specific band throughout different dimensional poles. This is great for having some bands affect more than one dimensional pole (or even the whole soundfield!).
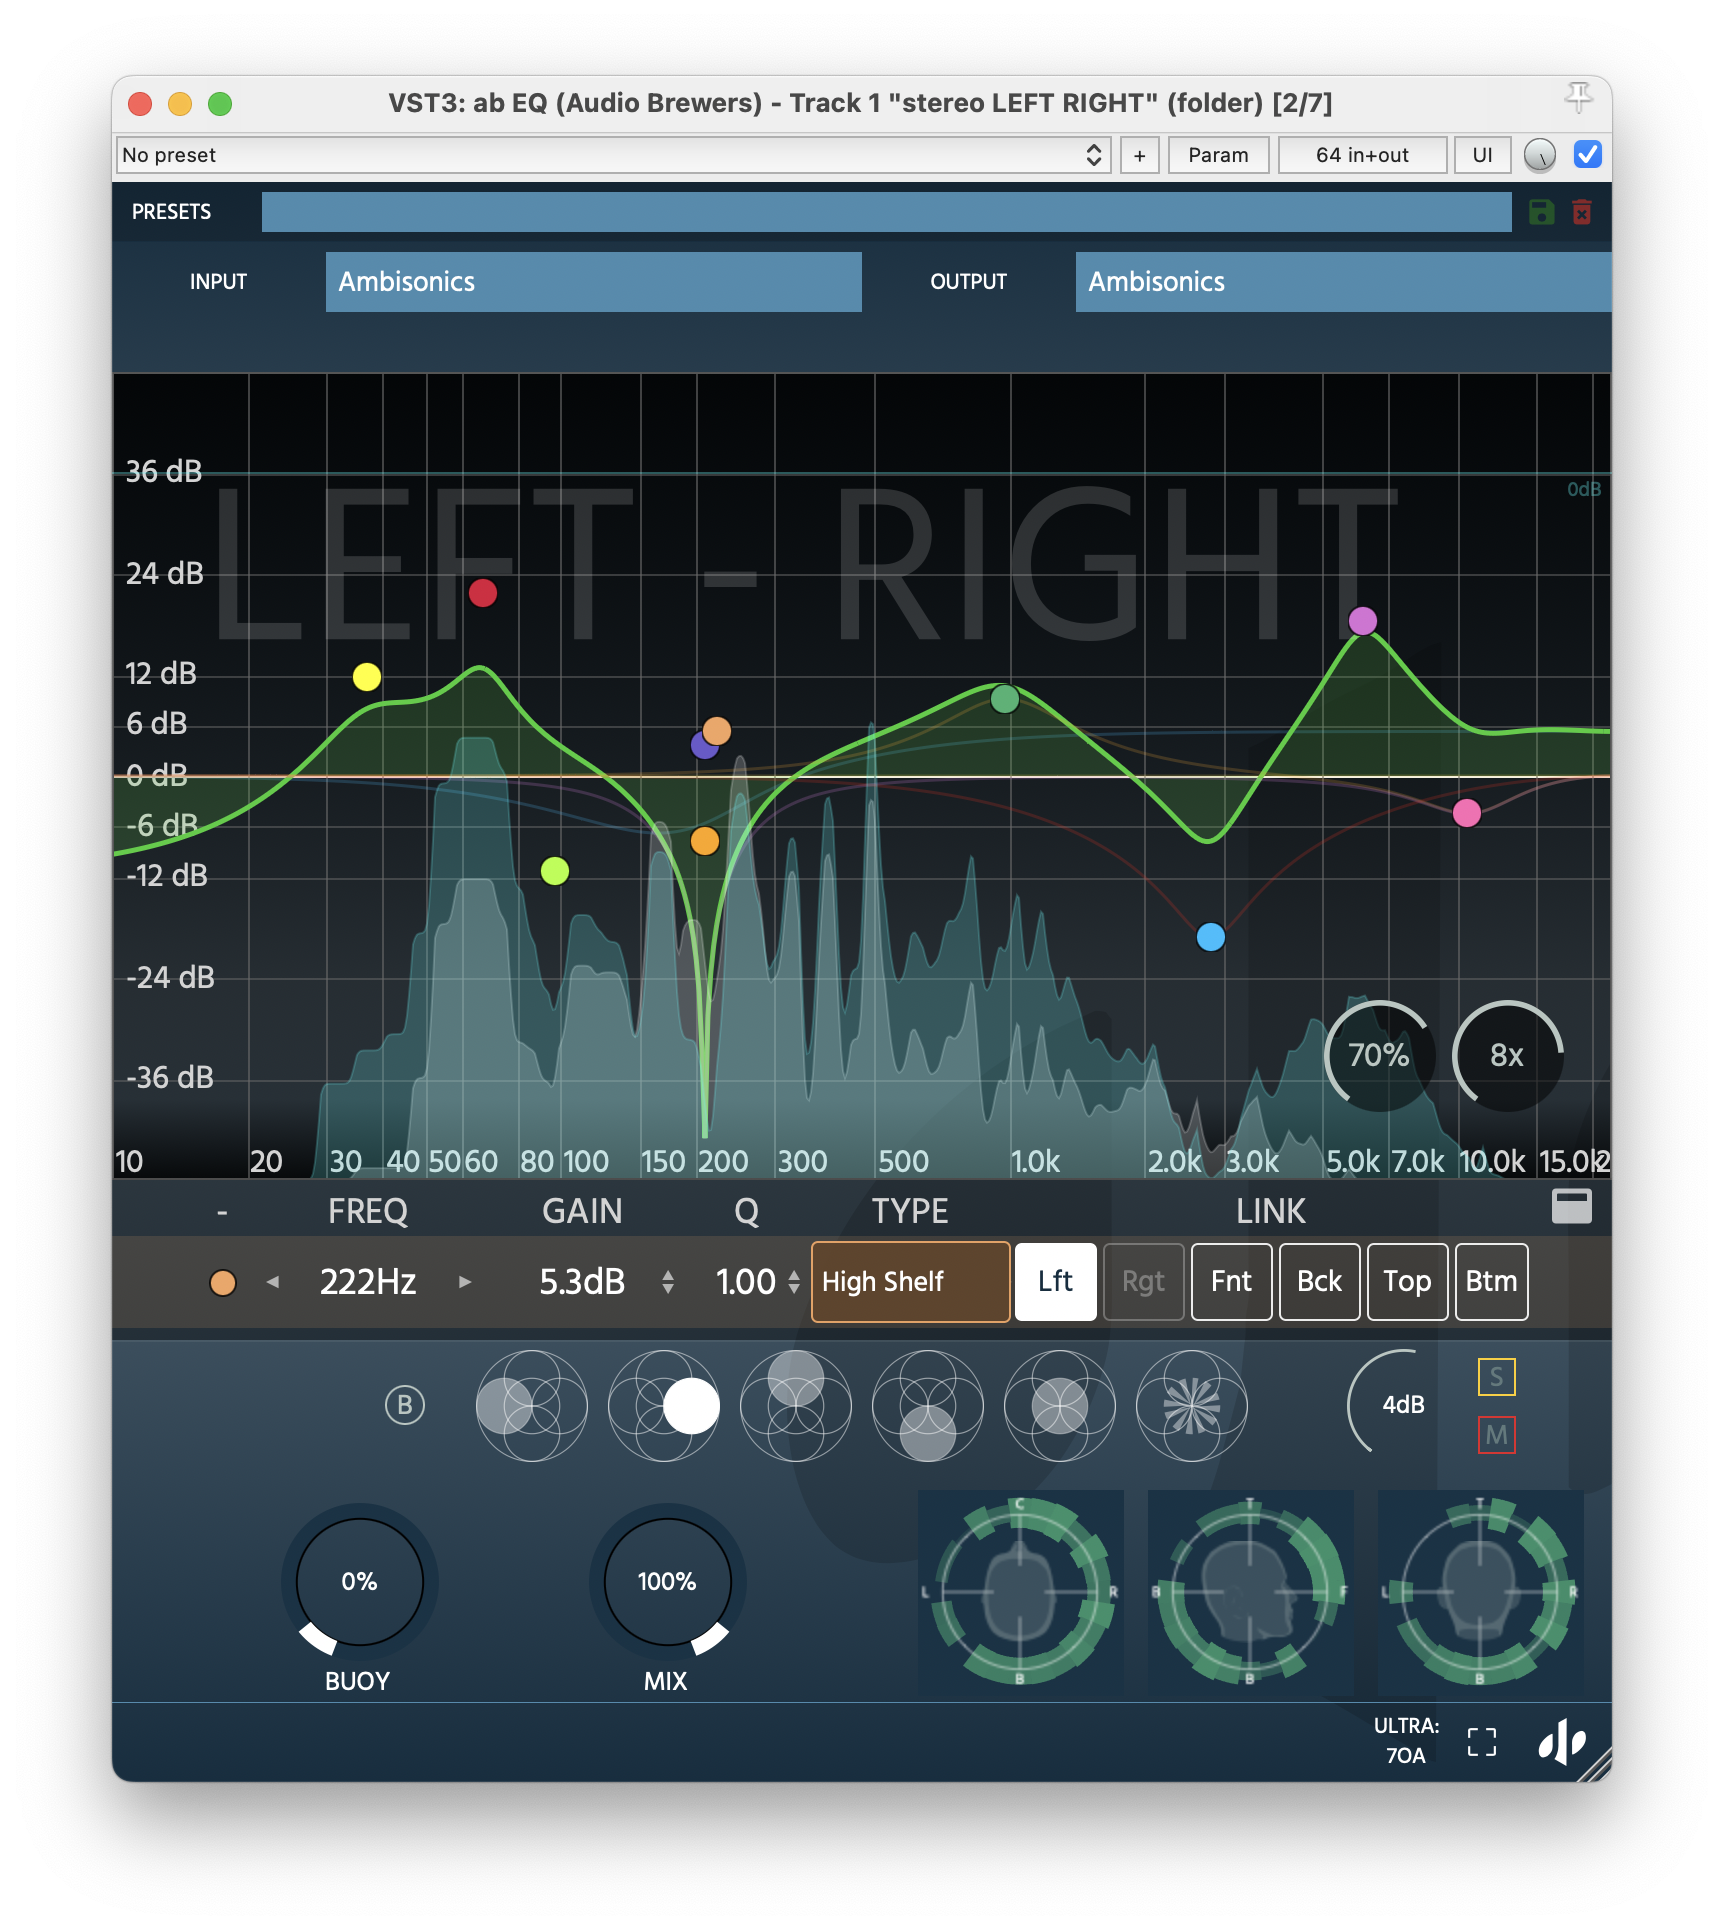
‘Dimensional Pole’ Controls

Below the Bands, you have the Dimensional Pole controls. These are the controls that allow you to make changes in each dimensional pole.
Mainly, you can select which dimensional pole you will work on by simply clicking on the button that represents it (LEFT, RIGHT, FRONT, BACK, TOP, BOTTOM), but that’s not all, each dimensional pole contains the following global controls:
BYPASS (B): Allows you to bypass the whole EQ for that pole, great for A/B’ing.
GAIN: Allows you to adjust the gain of the dimensional pole (from -48dB to +48dB) after EQ filters are applied.
SOLO: Allows you to SOLO the dimensional pole.
MUTE: Allows you to MUTE the dimensional pole.
Further Controls

On the bottom-left side of the plugin, two controls are available to further manipulate the way the sound behaves.
BUOY is a great control to increase the spatial image of a signal and have its sound distributed three-dimensionally to manipulate it. For example, if you are using a Mono signal, the sound will be focused in the Front-Centre… and if you wanted to manipulate the vertical dimensional plane (Top, Bottom), a Mono signal wouldn’t contain any information there. Well, the Buoy knob will send sound to all dimensional planes and like that, you will be able to hear sound in all dimensional planes, even if it comes from two-dimensional sources.
MIX is the final control of the processing chain, which will help you blend the final three-dimensional chorus you created with your original signal.
Finally, a visualiser is also included to visually guide you on how the final output of the sound is being shaped in the sonic field around you.
CPU Mode
At the bottom-right of the plugin when the output is set to Ambisonics, a CPU control is available to control the resolution at which the plugin works.


LIGHT mode was designed to work with 1OA signals (or for STEREO signals), HIGH mode was designed to work with up to 3OA signals, finally, ULTRA mode was designed to work with up to 7OA signals.
Examples:
If for example you are running a 1OA signal, there will be no difference in sound quality between LITE, HIGH, and ULTRA (aside for the increased CPU consumption).
If you are running a 3OA signal, there will be no difference in sound quality between HIGH, and ULTRA (aside for the increased CPU consumption).
On the other side, if you are running a 5OA signal and you set the plugin to work in HIGH mode, the signal will be capped to 3OA.
So based on the above, adjust the CPU mode to that of your highest-order signal.
-
If your audio is not Ambisonics, encode it to any Ambisonics order.
If your audio is Ambisonics, insert it in an Ambisonics track (1OA through 7OA).
Insert this plugin with the output width of your choice.
-
Make sure your signal is Ambisonics (if it’s not, encode it using ‘ab Encoder’
Insert this plugin.
-
Insert this plugin in an Ambisonics track AS A PANNER, and make sure the signal running through it is Ambisonics (encode it to Ambisonics if it’s not)
-
Make sure your signal is Ambisonics, encode it to Ambisonics if it isn’t.
Remember to set the track width to at least 4 channels. We highly suggest you simply use a 64in/64out track.
-
As Resolve 19 and above come with an included Decoder that cannot be swapped, this plugin is only useful if you want to grab 1 beam from an Ambisonics signal. To do that, insert the plugin in an Ambisonics track, and insert this plugin to create only 1 beam.
-
Use this plugin in a 9.1.6 track.
Make sure the signal running through it is Ambisonics.
Insert this plugin AS A PANNER.
ab EQ X
ab EQ X is a “light” version of ‘ab EQ’ designed to work in iOS decides as a Standalone or AUv3 plugin.
ab EQ X works just like ab EQ, but it’s different in that it only contains three dimensional poles (left, right and front) due to the limitations of iOS DAWs being in Stereo, and additionally, 5 bands instead of 10 are available.